Programming Adafruit Feather nRF52840 with the Nordic SDK
Introduction
The concept of a “Hello World” program was promulgated by Kernighan and Ritchie in “The C Programming Language” book. Completing such a program, in any language, means that you’ve accomplished the basics steps needed to start a project. Quoting the book:
This is the big hurdle; to leap over it you have to be able to create the program text somewhere, compile it successfully, load it, run it, and find out where your output went. With these mechanical details mastered, the rest is comparatively easy.
This is exactly the goal of this post- to run through the minimal set of steps required to run a basic example from the nRF52 SDK on the Adafruit Feather nRF52840 Express board in order to set the foundation to program the board without Arduino or the Arduino IDE.
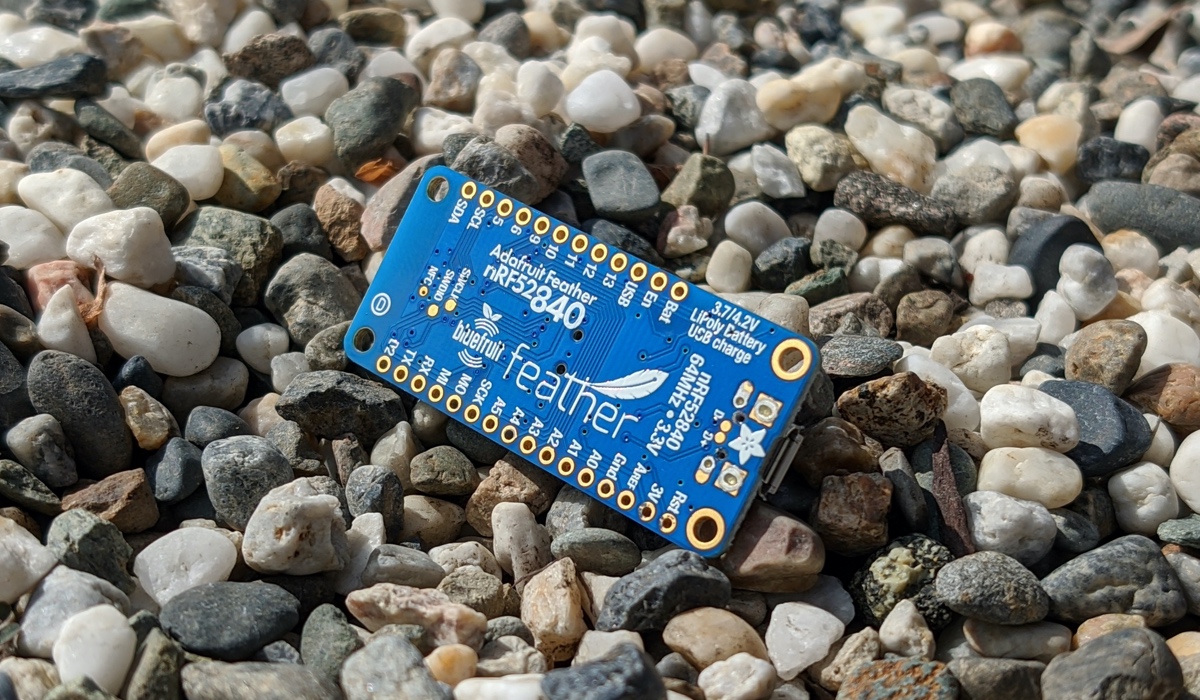
If you somehow managed to find your way here, I’m assuming this is exactly what you were looking for, so I’m going to skip the details about the board itself. The reason I’m writing this post is just to hopefully save the time-consuming research, trial and error I went through and hopefully get you up and running as quickly as possible.
I want to give credit to two excellent posts which this post is based on:
- nRF52840 Advanced Development With the nRF5 SDK by Sparkfun
- How to set up nRF5 SDK with ARM GCC by Makerdiary
I’ve basically compiled information from thesae two posts and added all the tiny details getting up and running with the Adafruit Feather so definitely check these posts as well. Especially if you’re on a Windows machine, since this post will be specific to Mac running OSX.
1. Install GNU Make
You should already have it installed if you have XCode installed. Open your terminal and type:
make --version
Your output should look something like this:
GNU Make 3.81
Copyright (C) 2006  Free Software Foundation, Inc.
This is free software; see the source for copying conditions.
There is NO warranty; not even for MERCHANTABILITY or FITNESS FOR A
PARTICULAR PURPOSE.

This program built for i386-apple-darwin11.3.0
If you want to upgrade make to the latest version, run the following:
brew install make
By default homebrew installs GNU make binary with “g” prefix (gmake). If you want to make it the default make, you have 2 options:
Run:
brew install --with-default-names make
OR, as suggested at the end of the installation: you can add a “gnubin” directory to your PATH from your bashrc like:
PATH="/usr/local/opt/make/libexec/gnubin:$PATH"
2. Install GNU Embedded Toolchain for Arm
On Mac this simply means downloading the latest version from here and unpacking it to a directory of your choice and then adding this folder to your bashrc path, like so:
PATH=YOUR_TOOLCHAIN_INSTALL_PATH/bin:$PATH

# For me, for example, this looks like this:
PATH=/Users/lior/dev/gcc-arm-none-eabi-9-2019-q4-major/bin:$PATH
Make sure you’re working with the expected version, and not some previous installation:
arm-none-eabi-gcc --version
# OR
which arm-none-eabi-gcc

# Note that if you've just udated your .bashrc file, you'll need to open a new terminal window/tab, or simply apply the changes like so:
source ~/.bashrc
3. Install the nRF5 SDK
You can download it from here. At the time of writing the latest version is 16.0.0. Later on you’ll also need the SoftDevice but I’m going to cover that in a separate post. Extract the .zip to a folder of your choice
4. Configure the nRF5 SDK Toolchain
Navigate to your SDK folder and then to the components/toolchain/gcc subfolder and edit the file Makefile.posix and update the GNU_INSTALL_ROOT and GNU_VERSION to the folder and version of your Arm toolchain folder and version respectively.
On my machine it looks like this:
GNU_INSTALL_ROOT ?= /Users/lior/dev/gcc-arm-none-eabi-9-2019-q4-major/bin/
GNU_VERSION ?= 9.2.1
GNU_PREFIX ?= arm-none-eabi
These variables are being used by the Make files in the SDK to call the toolchain commands
5. Add the Adafruit Feather board file
The SDK contains definitions for a few boards, but the Feather isn’t one of them. I searched through the Adafruit Github repo and found this in the Adafruit_nRF52_Bootloader repo and used it as a starting point. Another way to do it is to use one of the existing boards in the SDK as a starting point and change the pin numbers. If you do that, you’d want to use the pca10056.h which is the nRF52840 Preview Development Kit hardware, but to make it quick and easy for you, I created this gist. Note that additional changes might be required later on. This is solely for the purpose of running the blinky example.
6. Install adafruit_nrfutil
The nRF52 Development Kit board comes with an on-board SEGGER J-Link debugger allowing programming and debugging both the on-board SoC
You can follow the most up to date installations instructions in the adafruit_nrfutil github repo, but in a nutshell, assuming you have pip3 and Python installed, you’ll need to run the following 2 commands:
pip3 install -r requirements.txt
And:
python3 setup.py install
7. Build the Blinky example
You can perform the following steps directly inside the SDK, but in order to keep the SDK clean, and to make this as similar as possible to your own firmware, copy the blinky app from $(NRF_SDK_ROOT)/examples/peripheral/blinky to its own folder outside of the SDK.
Now let’s do the following:
- The project folder contains a
hexfolder. Delete it. Those are pre-built binaries. - The project folder contains several other subfolders for each of the supported boards. Rename
pca10056tofeather_nrf52840. This will be our baseline. Delete the rest of the folders.
You should end up with the main project folder containing only:
feather_nrf52840
main.c
Now navigate to the feather_nrf52840/blank/armgcc folder and edit the file called Makefile.
Watch out!
Makefiles must have a tab character before each command line. That’s tab, not spaces!
I strongly recommend that you enable whitespace viewing in your editor to easily spot and fix such errors.
If you use spaces you’ll get the following error: [*** missing separator. Stop.]
Update the name of the project and the and the SDK_ROOT variable. Add the OUTPUT_BINARY and DFU_PACKAGE variables. The first few lines should look like this:
PROJECT_NAME     := blinky_feather_nrf52840
TARGETS          := nrf52840_xxaa
OUTPUT_DIRECTORY := _build
OUTPUT_BINARY    := $(OUTPUT_DIRECTORY)/nrf52840_xxaa.hex
DFU_PACKAGE      := $(OUTPUT_DIRECTORY)/dfu-package.zip

SDK_ROOT := $(NRF_SDK_ROOT)
PROJ_DIR := ../../..
Now go down to the flash target (starts on line 136 in the original file) and change to the follwing:
dfu-package: default $(OUTPUT_BINARY)
  @echo Packaging $(OUTPUT_BINARY)
  adafruit-nrfutil dfu genpkg --sd-req 0xFFFE --dev-type 0x0052 --application $(OUTPUT_BINARY) $(DFU_PACKAGE)

bootload: $(DFU_PACKAGE)
  @echo Flashing: $(DFU_PACKAGE) via $(SERIAL_PORT)
  adafruit-nrfutil --verbose dfu serial --package $(DFU_PACKAGE) -p $(SERIAL_PORT) -b 115200 --singlebank --touch 1200

# Flash the program
flash: default dfu-package bootload
Note that you have to pass in the serial port parameter when calling make. Do the following: It’s time to make sure that your board is connected to your computer with aUSB cable. Double-tap the reset button on the board to switch to board to bootloader mode. You’ll know that it was successful since the NeoPixel LED will turn green. Now let’s find out the device name. In your terminal, type:
ls /dev/cu. *
You’re looking for something like this:
/dev/cu.usbmodem14101
Now, the moment of truth, let’s call the make command! Here goes:
make flash SERIAL_PORT="/dev/cu.usbmodem14101"
And if all goes well, your output should resemble the following:
Packaging _build/nrf52840_xxaa.hex
adafruit-nrfutil dfu genpkg --sd-req 0xFFFE --dev-type 0x0052 --application _build/nrf52840_xxaa.hex _build/dfu-package.zip
Zip created at _build/dfu-package.zip
Flashing: _build/dfu-package.zip via /dev/cu.usbmodem14101
adafruit-nrfutil --verbose dfu serial --package _build/dfu-package.zip -p /dev/cu.usbmodem14101 -b 115200 --singlebank --touch 1200
Upgrading target on /dev/cu.usbmodem14101 with DFU package /Users/lior/projects/blinky/feather_nrf52840/blank/armgcc/_build/dfu-package.zip. Flow control is disabled, Single bank, Touch 1200
Touched serial port /dev/cu.usbmodem14101
Opened serial port /dev/cu.usbmodem14101
Starting DFU upgrade of type 4, SoftDevice size: 0, bootloader size: 0, application size: 1700
Sending DFU start packet
Sending DFU init packet
Sending firmware file
####
Activating new firmware

DFU upgrade took 1.1218829154968262s
Device programmed.
Lovely! You should see the blue led on the board blinking. You’ve just finished your bare-metal, Arduino-free, Hello-World app for your powerful Feather! We’re going to take this to the next level in the upcoming posts.